
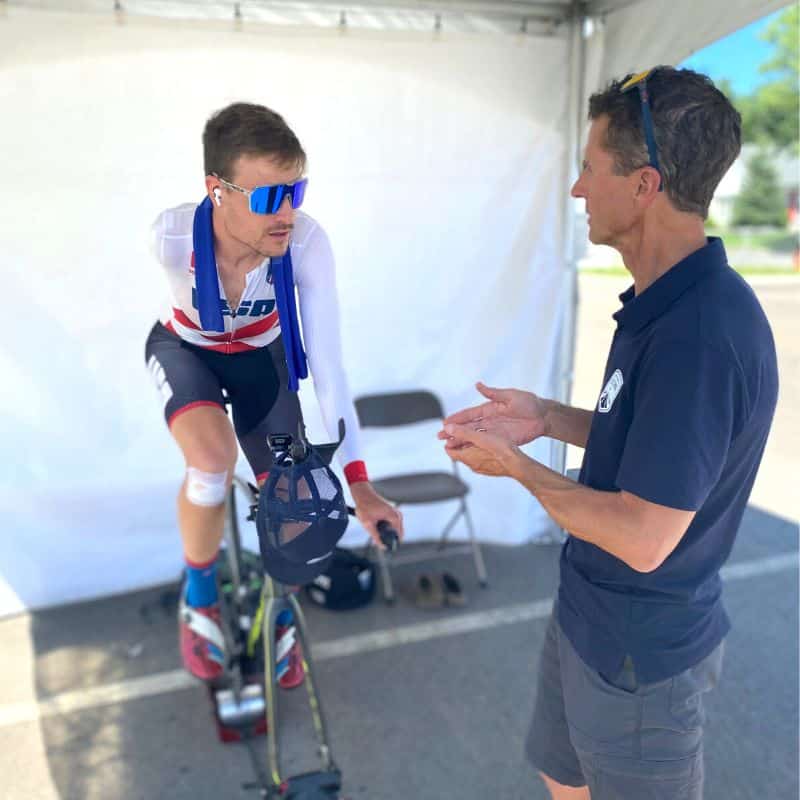
5 Bike Fit Tips That’ll Improve Your Comfort and Power
Updated On
March 7, 2025
By Jim Lehman – CTS Premier Coach
How you position yourself on the bike makes a huge difference in terms of comfort, power, and aerodynamics. While it’s a good idea for all cyclists and triathletes to get a professional bike fit, there are some basic guidelines you can use to troubleshoot problem areas and generally set yourself up in a neutral position.
The goal is to achieve a position that allows you to ride your bike without creating any injuries and one that will allow you to ride your bike for years. As an added bonus, the right fit will also make you more efficient and powerful.
Points of Contact: Saddle, Handlebar, Pedals
1. Try a Saddle Before You Buy

Finding the right saddle can be a bit of a process because it’s important to find the curvature, width, and shape that is comfortable for you.
Saddles with more curvature (and/or a channel down the center) are often great for athletes who have limited flexibility through the hips and lower back. The curvature allows you to rotate your hips forward more easily without putting too much pressure on sensitive areas.
The width and amount of padding in the saddle also have a big impact on comfort and performance. Finding the right saddle may take some time and some trial and error, so work with your local bike shop – many have a loaner program – so you don’t have to make a huge financial investment. A quick ride in the parking lot is often not enough to tell you whether a saddle will work for you in the long run.
Ergon offers a saddle selector tool that takes into account several factors that can help narrow down the best options for you.
2. Determining Saddle Setback

Move the saddle forward or backward so your knee is over the pedal spindle when the crank is in the 3 o’clock position.
Again, this is a good starting point, and then you can adjust your cleats fore and aft as needed.
Use your thumb to feel the ball of your foot on the inside of your shoe. With a pen, put a small mark on this point of your shoe so you can set the cleat using this as a landmark.
[blog_promo promo_categories=”camp” ids=”” /]3. Basics of Setting Saddle Height

While you can dial this in perfectly with a professional fit, here are some guidelines for roughly setting up your saddle height. These are especially useful when you have to jump on a loaner bike or even a bike in a hotel fitness center.
- Start with the saddle in a level position, parallel to the floor.
- Sitting on the saddle, pedal with your heels on the pedals. Your foot should maintain contact with the pedal without having to rock your hips.
4. Pay Attention to the Shoe-Pedal Connection

► Free Cycling Training Assessment Quiz
Take our free 2-minute quiz to discover how effective your training is and get recommendations for how you can improve.
The pedals are your third point of contact with the bike. It’s important that the platform is large enough to feel secure (not like you’re standing on ice cubes).
And the most critical piece will be adjusting the cleats properly, to make sure you have a stable and tight shoe to pedal connection that will ensure optimal power transfer and allow you to ride injury-free.
As a general starting point for many riders, you can set the middle indicator on the cleat slightly back, about 5mm, from the ball of your foot.
The angling of cleats and the lateral distance they are set from the crank (Q-factor) is dependent on each rider’s individual body structure, however, you want to make sure you don’t feel any twisting or tension in the ankles, knees, and hips while pedaling. You can start with the cleats set straight ahead and make minor adjustments from there. Note that each foot could require different angling.
[blog_promo promo_categories=”bucket list” ids=”” /]5. Handlebar Width and Reach Makes a Difference

With the handlebar, look at the drop and the width of the bars. If you have relatively small hands or a shorter torso, look for a shallow drop bar. The width of the bar should match the width of your shoulders, which will keep your arms in a neutral position when your hands are on the brake hoods.
You also want to ensure the handlebar reach is neither too long or short, as it can cause neck, shoulder, back pain, and compromise bike handling. You should be able to reach the hoods with a comfortable bend in the elbows without feeling like you need to scoot your body forward or backward on the saddle.
This should get you started, but if you need more help don’t hesitate to seek out the advice of your local bike fit professional. You can learn more about CTS 3D Dynamic Bike Fits here.
Related Articles
The Beginner’s Guide to Essential Bike Maintenance Skills
13 Easy Wake Up Tips For Early Morning Workouts
► FREE Mini-Course: Learn How to Maximize Your Limited Training Time
Learn step-by-step how to overcome limited training time and get faster. Walk away with a personalized plan to increase your performance.
"*" indicates required fields
About the Author
Jim Lehman
CTS Premier Cycling Coach
Jim Lehman, a seasoned coach with a passion for performance, believes in fostering athletic success through a holistic approach that balances sports, family, and personal well-being. With a master’s degree in Exercise Physiology and extensive experience coaching elite athletes, including the US Para-cycling team at multiple Paralympic Games, he is dedicated to helping athletes find equilibrium in their lives while achieving their competitive goals.
Comments 10
Why ditch your default bike saddle? There are some good reasons why you should ditch your old saddles and opt for a comfortable bike seat. Your default bike saddle is far from perfect when it comes to supporting bigger bottoms. Being too small for your size they are really painful and itchy to your bigger butts. When riding a bicycle for hours you need something that is comfortable to land on and not one that made you hate biking because of the terrible butt pain after riding. Adjust Your saddle position if need be.
How High Should Your Bike Seat Be? This allows you to maintain good posture when biking. To determine whether you have the correct saddle, your heel should graze the pedal in the 6 o’clock position once the pedal is at the lowest position. To get the right fore/aft saddle position, your knee must be above the pedal spindle once the crank arm is in the 3 o’clock position. Your comfort level also depends on the correct top tube and stem length. There are different ways to set your bike seat height properly so you can be more comfortable and at ease when riding on your bike without worrying about sore muscles and bike fatigue: Holmes method, heel method, etc.
Comfort is the key for a more fun and enjoyable bike ride. The seat height has a direct impact on the level of convenience and comfort when cycling. Having the correct bike seat height that compliments your stature or anatomy is very important.
Pingback: How to Start Training for Cycling - CTS
No one mentions pedal axle extenders when it comes to bike fit. I’m not tall, but I have wide hips. When I switched to clipless pedals, my ankles would begin to ache near the end of every ride. No amount of cleat adjustment would help because doing so would also lead to hot foot problems. And then I discovered pedal axle extenders. They widen my stance on the bike so my hips and feet and ankles are in a more natural position. Though extenders add some weight to my bike, it’s a small price to pay since I now ride in comfort.
Once you find a saddle that fits your bum, use it until it is no longer available! Don’t be enticed by the “latest cool thing”, and don’t worry if it is a couple of ounces heavier. It is all about power generation and to maximize power you need the best seat.
When looking for a saddle go to a bicycle shop that can find your correct saddle width and type for the kind of riding you do. There are too many options out there to try them all. Get measured. Listen to the professional. Be comfortable, powerful and efficient.
getting measured is all well and good.. but somebody has to thumb your ass.
for item 3 – saddle height, this no-hip-rocking benchmark would apply to both a too high and too low seat position? This topic seems a tad lightly covered given the importance of saddle height and how a improper adjustment can lead to either injury or diminished power.
I always arrived at saddle height another way but look forward to given this a try.
Thank you for the continued tips
On finding a saddle…ask around to your fellow cyclists to see if they have one they bought which didn’t work out for them. Borrowing such a saddle gives you an easy way to try different ones and a chance to buy one cheap, and the person you bought it from will be glad to have gotten rid of it. Win-win!